
I have found that food bloggers are often victim to this. Wandering Chopsticks was one of the first who introduced me to this subject, and she had to take measures by adding watermarks to her photos. She writes more about this in her guide to blogging. It made me more aware of the problem, and I knew that it would be something I would have to start doing in the near future. While my blogs do not create much traffic, I do want to cover all of the bases of "what if's."
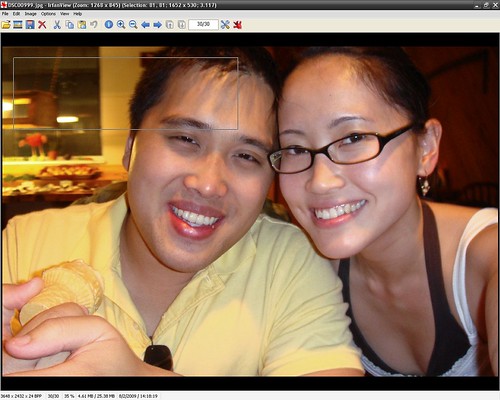
With pictures usually being the first to be "stolen," I looked into adding watermarks for my photos. At first I thought it would be difficult without the use of Photoshop or some sort of special photo manipulation software. I played around with Irfanview, the program we use to view our photos on the computer, and I found a solution to my problem. It was easy, and now I'm practically a pro at inserting watermarks. By using this method, I am limited by the creativity of the watermark but I don't mind. My photos are no where near professional and artistic. A simple watermark is all I need.
Want to give it a try? Here are my Yin friendly directions:
Steps to Creating a Watermark w/ Irfranview
- Download Irfanview here. Don't worry. It's free and Yin approved!
- Open up a photo in Irfanview.
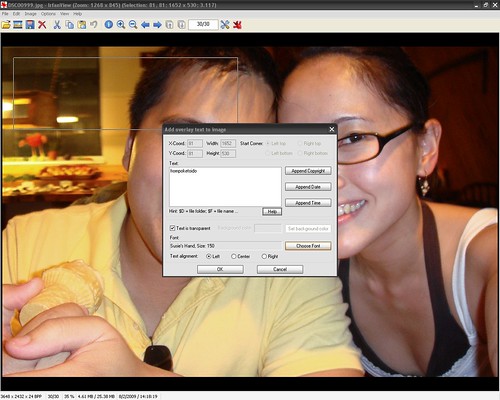
- Using your mouse, click on the part of the photo you would like to be watermarked and drag to create a box.
- Next click on "edit" and select "insert text into selection" or simply use the nifty shortcut of [ctrl] + [t].

- Type the text into the text box.
- Click on "choose font" on the bottom right to get to the font selection. Be creative and use a fun font. Also change the size and color to fit your photo.
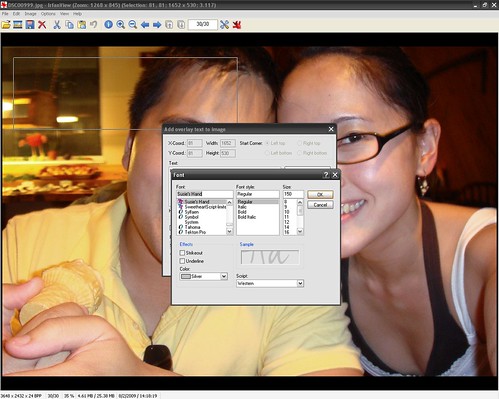
- Choose your text alignment - left, center, or right
- Click "ok," and you're all done!
- Don't forget to save your work! I recommend saving it as a new photo so that you still have the original copy with no watermark.

Simple enough, right? Do make sure that it's everything you want it to be. Don't be afraid to click "undo" multiple times to perform some trial and error to figure out the perfect font, color, size, and alignment. While it is time consuming, it is definitely worth it. Go ahead and give it a try!
0 comments:
Post a Comment